
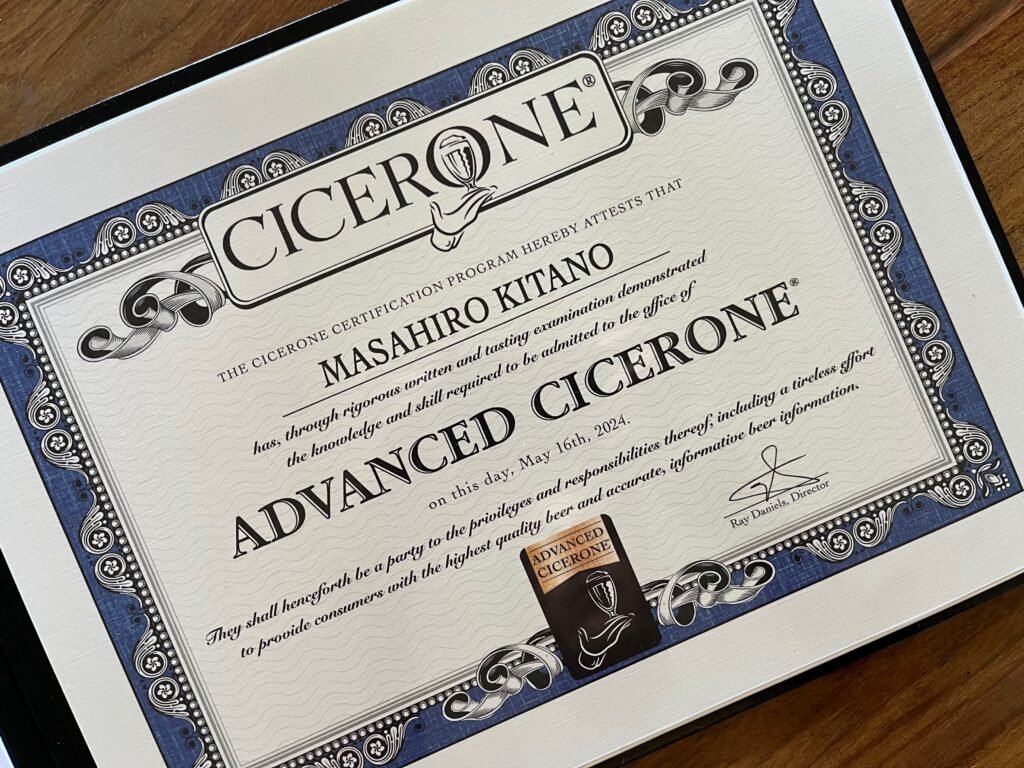
My journey toward beer certifications culminated recently with passing the Advanced Cicerone® exam. Achieving the BJCP National Beer Judge certification was a significant milestone that deepened my understanding of beer evaluation and brewing standards. The overall experience was incredibly challenging. Now that this demanding path has reached its end, I find myself with a touch of post-accomplishment emptiness. However, before the details fade, I want to share my tips and insights for those interested in taking these exams.
I’ve created an Excel spreadsheet: Ikasu_Beer_Study_v01.xlsx (link below) available for free download, with no fancy macros or viruses included. I believe this tool is useful for anyone preparing for both the BJCP and Cicerone® exams. It’s designed to help efficiently organize and master the extensive information required for these rigorous exams.

BJCP (Beer Judge Certification Program)
I first heard about the BJCP on the beloved Brulosophy podcast, where it was occasionally mentioned while explaining beer styles (they later dedicated an entire episode to the BJCP). At that time, I had just started homebrewing more seriously and wanted to learn about beer in a systematic way. However, attending specialized brewing schools like UC Davis, OSU, or Siebel seemed impractical due to time and financial constraints. The BJCP is a volunteer-based organization primarily focused on updating beer style guidelines and providing certifications to judges at various levels: Recognized, Certified, National, Master, and Grand Master.
Here is the exam structure:
BJCP Exams:
- Entrance Exam (Online Exam) – Fee: $10
- Beer Judging Examination (Tasting Exam) – Fee: $40 for the first attempt, $15 for subsequent retakes.
- Beer Judge Written Proficiency Examination (Written Exam) – Fee: $25
The exam fees are quite reasonable, and you can study independently or in groups, often with local homebrew clubs or through classes. In retrospect, I wish I had discovered Al Boyce’s “BJCP Exam for Dummies 2019” earlier, as it’s a comprehensive guide that would have made my preparation much easier.
BJCP Online Exam
The first step to becoming a Certified Beer Judge is the Online Exam, which is surprisingly challenging. Although it is an open-book exam that allows you to use various resources (printed, online, including ChatGPT), the real challenge lies in answering 180 questions in 60 minutes (about 20 seconds per question). You must answer 116 of the questions correctly (64%) to pass. I used the “Beer Style Compare-O-Matic” for difficult questions but tried to limit its usage to manage time efficiently. The complexity of questions varies significantly, ranging from simple True/False to complex Multiple Choice with Multiple Answers. Here’s the breakdown:
- True/False (simple): 112 questions (62.2%)
- Multiple Choice – Single Answer (medium): 44 questions (24.4%)
- Multiple Choice – Multiple Answer (complicated): 24 questions (13.3%)
The scores for each type of question are weighted equally, so missing all the Multiple Answer questions still leaves a high chance of passing. However, spending too much time on complex questions can risk leaving simpler ones unanswered.
BJCP Tasting Exam
The next step is the Tasting Exam. This setup may be familiar to someone who has experienced beer judging at local homebrew competitions. You judge 6 beers of different styles (you are notified of the style when you receive the beer) in 90 minutes, writing scoresheets, and that’s it.
I hear here and there “The best way to learn how to write the best scoresheets is to go to judge at competitions” that I partially agree with. There’s no doubt nothing else can replace hands-on experience. However, just going to judging session and judging beers may not help you improve your judging skills or your scores in the exams.
In beer competitions, judges are paired with someone else. If you’re uncertified, you’re supposed to be paired with a judge ranked higher than Certified Rank. But this doesn’t mean your experienced partner is going to tell you how to write Certified Rank scoresheet (which I occasionally do). Instead, newbie judges are usually stressed or too focused on how many scores they should add to the beer they’re judging, and try not to be embarrassed by giving a score way off from the experienced partner. This mentality just translates to the exam setting.
I recently graded the examinees’ scoresheets, which is a procedure to score the scoresheets (sorry for confusion!) by comparing them with the ones made by proctors (usually BJCP judges ranked higher than National) and found that many examinees missed the point – it’s an exam graded by a person like me, based on certain criteria:
- Scoring Accuracy (20 points) – How close your scores are with proctors’ scores.
- Perception (20 points) – How close your descriptions are to proctors’ descriptions. *easy
- Descriptive Ability (20 points) – How well you write. *easy
- Completeness and Communications (20 points) – Just check mark, did you write everything you were asked? No empty lines? *The easiest
- Feedback (20 points) – How well your feedbacks are. *easy
What I’ve gathered from conversations with examinees on the exam day and with judges who mostly gave up ranking up from Recognized level because their second or third trial was unsuccessful, along with my grader experience mentioned above, is that examinees pay too much attention to Scoring Accuracy, which is just 20% of the overall score. Let’s say you dramatically miss this part, you won’t get 0. Instead, you get 9 points. What? Essentially, you are already assured 9 points and you spend most of your effort on raising 11 points. Look at the rest of the 80 points. Come on.
Let’s forget about Scoring Accuracy and focus on the rest. Just follow the rules below and you can earn nearly 80 points automatically:
First, read the instructions on the Scoresheet:
In the Aroma section, you see “Comment on malt, hops, esters, and other aromatics” — just do it. For example:
- Malt: Bread dough
- Hops: Floral
- Esters: Pear
- Others: DMS
This is definitely not enough to reach 80 points. You want to include a minimum of two (ideally three) lexicons:
- Malt: Bread dough, White bread, Water cracker
- Hops: Floral, Herbal, Spicy
- Esters: Pear, Red apple, Pineapple
- Others: DMS, Diacetyl, Acetaldehyde
Still not enough? Then add intensity:
- Malt: Medium-low; Low bread dough, Medium-low white bread, Medium-low water cracker
- Hops: Medium-low; Medium-low floral, Medium-low herbal, Low-no spicy
- Esters: Low-no; Low-no pear, No red apple, No pineapple
- Others: No; No DMS, No diacetyl, No acetaldehyde
Now it looks great. If you write this much, the lines must be already completely full but double-check there’s no empty space (You’ll get a penalty if you leave empty lines more than 3). This is basically how Descriptive Ability (20 points) and Completeness and Communications (20 points) work.
Okay, let’s think about Perception (20 points). The key is having the lexicons (such as bread dough, herbal, etc.) prepared in your mind before the exam day and being ready to use them. They’re listed in Ikasu_Beer_Study_v01.xlsx (link above), and as you can see, it’s quite simple! Once the exam administrator lets you know the beer style you’re judging, you’re automatically ready to use those lexicons.
For example, Czech Premium Pale Lager :
- Hop profile: Czech hops (Peppery, Spicy, Floral, Earthy)
- Malt profile (according to SRM 4-10; Pale to Deep Gold): Biscuit, Honey, Graham cracker, Shortbread
Of course it’s possible that the beer you judge may have some different characters, but you want to understand these are the basic lexicons that proctors tend to choose. As long as you stick to them, there’s a high chance you will align well with the proctors, and that’s how you score points.
Then Feedback (20 points). Most examinees use the “Overall Impression” section, the last part of the scoresheet, and that’s right and straightforward. Some use other sections as well, and that’s fine too.
Firstly, you have to show appreciation to the brewer, otherwise, you get a penalty. Let’s say, “This is a good example of Schwarzbier with a representative clean fermentation profile and showcasing roasted malt characters that I enjoyed a lot.”
Assuming your assigned score is below 45, you’re supposed to add at least two suggestions to improve the beer, consistent with the rest of the assessment. For example, if you mention “Slight DMS” in the Aroma section, you’re supposed to write, “However, the slight presence of DMS was distracting. Be mindful of a fully rolling boil long enough to evaporate out all the DMS and DMS precursors.”
If you mention “Hint of astringency” in the Mouthfeel section, you’d write, “I sensed a hint of astringency. This could be from roasted malt and became noticeable due to a very light body and dry finish. I’d mash at a higher temperature or use dextrin malt to increase body.”
Flaws are always present. Even if it feels perfect to you, you need to say something! Is the beer really crystal clear? Are the bubbles super fine and lasting forever? Is the carbonation level really perfect? Isn’t the hop aroma too aggressive? It’s important to know you never lose points by saying something; instead, it adds up.
Lastly, I touch on Scoring Accuracy (20 points) again. As mentioned above, you never dramatically fail this part because you already get 9 points, which isn’t the case for the rest of the parts (Honestly, I don’t understand why this unfair exists, anyway). Also, technically you can’t go below 13/50 (I don’t understand this part either). And world-class, extremely fantastic beer is 45/50. So, the dynamic range is 13-45. Now, imagine proctors assign a score of 13 or 45. It won’t happen. As the midpoint between 13 and 45 is 29, I’d stay within the range of score of 10 up and down, that is 19-39.
With all this knowledge under your belt, you’re ready to judge at beer competitions. Staying within 15 minutes per beer, the real exam setting, will definitely help. Writing scoresheets alone at home or in a taproom (which I don’t recommend; if you do, don’t share those with bartenders, especially if the scores are low!) can be daunting. However, at a judging session, you naturally get into scoresheet writing mode, and the bonus is you can align your Scoring Accuracy with experienced judges. You can find more detailed information in The BJCP Exam for Dummies 2019.
The frustrating thing about BJCP is that it really takes a long time to get the results. This is a volunteer-based organization, which is why the fees are ridiculously cheap. The normal wait time is 6-8 months. Yes, it’s long. And this is something you’ll see after that:
So, what happened with my Helles Bock? Lol…
BJCP Written Exam
Once you score 80/100 on the Tasting Exam, you become eligible to take the Written Exam to become a National Ranked Judge. This exam is infamous for its five essays that need to be handwritten and completed in 90 minutes:
- 20 True-False Questions (deductions of 0.5 points for each incorrect selection) – 2 min
- Essay 1: Style Comparison (20 points) – 20 min
- Essay 2: Recipe Formulation (20 points) – 16 min
- Essay 3: Style Comparison (20 points) – 20 min
- Essay 4: Beer Characteristics (20 points) – 16 min
- Essay 5: Process & Ingredients (20 points) – 16 min
It looks very intimidating, though it turned out to be passable even for someone whose primary language is not English. The BJCP Exam for Dummies 2019 is a great resource that I followed with slight modifications in the Recipe Formulation part found in Ikasu_Beer_Study_v01.xlsx (link above). The essence is to “avoid sentences, use grids and bullet points.” This approach, though counterintuitive for essay settings, works well by saving a lot of time and reducing the amount of painful handwriting. I haven’t graded the Written Exam yet (it must be very challenging), but essentially the same rules as the Tasting Exam apply here: it’s an exam graded based on specific criteria.
For example, in Essay 2: Recipe Formulation, you just need to fill out these 20 sections:
- Batch Size
- OG
- FG
- IBU
- SRM
- Grains
- Hops
- Water
- Yeast
- Mash
- Vorlauf
- Sparge/Lauter
- Boil/Chill
- Fermentation
- Packaging
- Aroma
- Appearance
- Flavor
- Mouthfeel
- How the ingredients/processes impact the style
That’s it. They select one style out of the 12 listed styles, which are detailed in Ikasu_Beer_Study_v01.xlsx (link above) along with recipes, so you can simply memorize them and output.
In the Written Exam, unlike the Tasting Exam, there’s no reliance on a proctor’s answer, which reduces uncertainty and makes it easier to strategize. It’s essentially a game of memorization and output. The more you memorize, the less you need to think during the exam, allowing you to focus on outputting efficiently. Fast handwriting and minimizing redundancy are also crucial. In today’s age of instant AI responses, the relevance of memorization and handwriting may be questioned. However, undergoing this rigorous process sets you apart. At the very least, there should be an option for typing.
Below, I’ve included my actual exam and results. As you can see, even with Boyce’s strategy, there’s still a significant amount of handwriting. Oh, and one very important tip: use a pen that allows you to write quickly (avoid mechanical pencils—they’re slow and frustrating)! I personally use a lightning-fast Japanese brand Pilot G-2 07. Additionally, you can bring a ruler for drawing grids; I only used a mechanical pencil for this, as there was a high chance I would mess up without it.
Cicerone® Certification Program
Once I completed the BJCP Tasting Exam, I immediately decided to tackle Cicerone®. Why? I thought it was kind of cool. Also, I had to wait over six months for the BJCP results (yes, it’s a volunteer-based organization), and I wanted to find something that would motivate me to keep studying. Cicerone® is the beer version of a wine sommelier. While BJCP focuses on sensory analysis, beer styles, and recipe formulation, Cicerone® requires broader knowledge, including what BJCP covers plus distribution laws, draft line handling, food pairings, etc. This is why people in the industry tend to take Cicerone® more seriously than BJCP (though this doesn’t mean they always take Cicerone® seriously). Similar to BJCP, there are ranks based on achievement (Level 1: Certified Beer Server, Level 2: Certified Cicerone®, Level 3: Advanced Cicerone®, Level 4: Master Cicerone®). The exam fee is more expensive than BJCP ($79 for Level 1, $400 for Level 2, $800 for Level 3, and $995 for Level 4) but still significantly cheaper than paying for schools.
Certified Cicerone®
After passing Level 1: Certified Beer Server without any studying, I began searching for study materials for Level 2: Certified Cicerone® and stumbled upon the Beer Scholar online course founded by Chris Cohen. Fortunately, I caught it at the right time as he was just launching this program and offered a substantial discount (which isn’t available anymore). I thoroughly enjoyed this program. As mentioned earlier, the Cicerone® Certification Program covers a broader range of topics not addressed by BJCP. Specifically, I found aspects like distribution laws, draft line maintenance, and beer and food pairing to be unfamiliar territory initially. Additionally, the four essay questions were daunting before I took the BJCP Written Exam, but Beer Scholar’s course navigated me through these sections effectively. Chris also provided valuable insights into what to expect at the Tasting & Demo Exam, including off-flavor identification and style discrimination, which greatly aided my preparation.
The actual exam consists of an online Written Exam (3 hours) and an in-person Tasting & Demo Exam (45 minutes). Yes, three hours with no break. This is a “closed-book” exam, unlike the BJCP Online Exam, and AI-assisted motion tracking is implemented in the exam app to capture any attempts to cheat. Thanks to Beer Scholar, I excelled in both the Online and Tasting Exams. The Online Exam felt much easier than his example exams. I enjoyed the Tasting Exam that took place at White Labs in San Diego, where I returned a few times for the Advanced Cicerone® Tasting Exam later.
Advanced Cicerone®
Based on what I had read while studying for Level 2: Certified Cicerone®, I knew the knowledge required for Level 3: Advanced Cicerone® would be exponentially greater than the difference between Levels 1 and 2. However, after easily passing Level 2, I thought I had reached a certain point, which was a mistake. On the day I passed the Level 2 exam, I signed up for the Level 3 Tasting & Oral Exam happening in a few months at the same White Labs in San Diego, partly because I already planned to be there for Homebrew Con and the BJCP Written Exam in the same week. In retrospect, that wasn’t the best idea, although it wasn’t too crazy.
I got to know a local Advanced Cicerone®, Scott Fielder, from Beer Scholar, who kindly shared his knowledge about the Level 3 Tasting & Oral Exams with me by bringing potential test samples for all panels of the Tasting Exam to my apartment and offering personal classes! One of the biggest differences between Levels 2 and 3 is the Oral Exam, where you are asked questions regarding beer styles and food pairing by a proctor and are supposed to answer immediately. This is the most intimidating part for most examinees, including me, as I still struggle with English conversation. Scott walked me through the whole process, conducting test runs multiple times with his (naturally or roleplayed) intimidating attitude, which helped me become familiar with the situation. Right before my Tasting Exam, Scott launched the Beer Scholar AC Coaching Program, which has been very successful. Although I was tempted to sign up, I decided not to, believing I had learned enough from him to at least pass the Tasting Exam part.
My first attempt at the Tasting & Oral Exams was half-successful. I excelled in the Oral Exam with a score of 85, thanks to Scott, but I failed the Tasting Exam with a score of 70, where 75 is the minimum required to pass regardless of the other parts. Although it looked close to passing, it wasn’t.
The Tasting Exam consists of four panels (15 minutes each):
- Off-Flavor Identification (25 points) – 6 samples
- Consumer-Focused Description (25 points) – 3 samples x 5 descriptors
- Style Discrimination (25 points) – 5 samples
- Technical-Focused Description (25 points) – 2 samples (one with an off-flavor spiked)
I quickly learned how to handle Panels 2 and 4, thanks to Scott’s personal coaching.
In Panel 2: Consumer-Focused Description, let’s say you get a hoppy IPA-like beer (they don’t disclose the style). You might write down five descriptors such as:
- Dank
- Kinda Malty
- Clear AF
- Crispy Boi
- OG (meant for Onion & Garlic)
This may earn a low score for barely addressing hoppiness and maltiness. The goal is to translate the aroma and flavor profiles to your consumers with positive and appealing words. No jargon is accepted. You can’t mention appearance or mouthfeel either. This works, for example:
- Pacific Northwest Forest Trails
- Indica marijuana on a Los Angeles street
- Fresh cut Brazilian passionfruit
- Water crackers freshly opened from a bag
- Lightly baked pizza dough, not charred yet
They may sound cheesy, but this is how it works. You are scored on your ability to describe the beer with vibrant vocabulary, and importantly, without overlapping with previous descriptors.
It’s crucial to mention malt and hops for all samples, even if their presence isn’t obvious. Let’s consider a different situation. If you have a beer that smells and tastes like a kettle sour infused with tropical fruits, you may be tempted to list only tropical fruits like:
- Mango
- Passionfruit
- Guava
- Pomegranate
- Dragon fruit
This might not rate poorly, but there is significant overlap in terms of flavor profiles, and more importantly, it sounds more like a tropical fruit juice blend than beer. Beer always includes malt and hops (and I’m not referring to the technical terminology of ‘beer’ here, but rather the experience of ‘beer’ you encounter in the exam).
It’s crucial to include malt and hop characteristics in each beer sample. Malt can be present but subtle, reminiscent of Hawaiian white bread. Hop characters aren’t limited to dank or fruity; they can be floral, like early summer lavender, or herbal, such as sprinkled dried rosemary, albeit very subtly. By incorporating malt and hop descriptions, you’re already covering two out of the five required descriptors with vibrant language you’ve prepared in advance (as mentioned earlier, you can decide on specific lexicons to use based on the type of beer), which minimizes overlap with the remaining descriptors, right?
Panel 4, Technical-Focused Description, was not a big struggle for me, as it’s similar to writing BJCP scoresheets. There is a difference, though: you need to intentionally use technical terminologies. I found the complete list of these compounds in the Master Cicerone® Syllabus and checked out the description of each compound one by one through the AROXA™ website and Em Sauter’s Pints and Panels® (this website is super educational and fun!). These descriptions are now listed in Ikasu_Beer_Study_v01.xlsx (link above).
Another important thing is you only have 15 minutes for two beers, which is already half of the BJCP Tasting Exam, with the task of identifying an intentionally spiked off-flavor in one of the two beers. This is really challenging. Firstly, you really have to write lightning fast (preps for the BJCP Written Exam really helped in this aspect). One tip: I opted to write “Malt, Hops, and Ferm. Characters echo Aroma” in the Flavor section, thanks to Scott’s advice. It actually makes sense because, regarding malt, hops, and fermentation characters, the flavor must be identical or very similar to the aroma, right? Here is an example (imagine you complete this in 7 minutes and 30 seconds from the time you start sniffing the beer):
Aroma: Malt – medium-low: medium malty (2-acetylpyridine), medium-low grainy (isobutyraldehyde), low toasty (melanoidins), no roasty (2-furfurylthiol); Hops – medium: medium resinous (myrcene), medium citrus (citronellol), medium grapefruit (3-mercaptohexanol); Fermentation Characters – low-no: low-no pear (ethyl acetate), low-no red apple (ethyl hexanoate); Other – no DMS, no diacetyl, no phenols.
Appearance: Color – deep golden; Clarity – crystal clear; Head – white, with a mix of big and fine bubbles; retention – moderately long.
Flavor: Malt, Hops, and Ferm. characters echo Aroma; Bitterness: Medium (iso-alpha acids); Balance: leans toward hop bitterness against malt sweetness; Finish: moderately dry.
Mouthfeel: Body: medium-light (dextrin); Carbonation: moderate; Warmth: low ethanol, no fusel alcohol; Creaminess: low beta-glucan, no lactose; Astringency: very low polyphenols.
Off Flavor: Isovaleric Acid.
Do you know which style I am talking about?
While I consistently scored well in Panels 2 and 4, Panels 1 and 3 were always problematic.
Panel 1 is Off-Flavor Identification, where they spike a base beer (usually canned Heineken, Miller Light, or a 1:1 mix of them) with six different off-flavors selected from a list of 12. I bought the official kits (Standard $59 + Advanced $149) and made 2x and 1x concentrated samples. I went through all the 1x samples at once and revisited the 2x samples for the ones I didn’t get right. I soon realized my strengths and weaknesses; for example, I never fail at detecting DMS (corn), but I struggle with H2S (rotten egg), which helped me strategize. I repeated this by myself three times, happening a few days before every single exam.
It was interesting to see how sensory skills develop. I originally thought I was completely blind to Diacetyl on the first round, as a person who grew up in a culture with a total absence of this compound (no offense), but after repetitive training, I finally got it with no fail. Honestly, I like this off-flavor.
Another tip for the exam is that they don’t show the list of 12 off-flavors on the exam day, so you need to memorize them. I found that having the list on hand really helps when figuring things out during the exam. That’s why I decided to write down all 12 off-flavors once I received the paper right before the exam (you can’t smell or taste the samples before the clock starts, but you can write whatever you want before).
Panel 3, Style Discrimination, presented its own challenges. Basically, you get 5 beers, and for each beer, 4 potential BJCP beer styles are listed. These styles are very similar, such as 1. American Blonde Ale, 2. American Lager, 3. Belgian Blond Ale, and 4. Cream Ale. You might hope that the beer has a strong Belgian character, but that is not always the case, unfortunately.
I experimented with various methods, such as purchasing similar styles—like Schwarzbier, British Porter, Irish Stout, American Porter, Baltic Porter, American Stout, Imperial Stout, Oatmeal Stout, and Sweet Stout. This was already a huge effort, and more pain awaited. Attempting to identify each one at once in a blind setting (literally, I wore an eye mask) was informative but not particularly enjoyable. Ultimately, the goal is to appreciate beer without feeling stressed.
Beer Scholar offers an engaging YouTube series that explores strategies for mastering Style Discrimination. It’s both educational and enjoyable to taste these beers alongside experts and learn how they articulate the nuances between these styles. They currently provide 15 comparisons of difficult-to-discriminate styles, which have proven immensely valuable in refining my skills.
In both my first and second attempts, I scored 50% (3/6) in Panel 1: Off-Flavor Identification and 60% (3/5) in Panel 3: Style Discrimination. I consistently failed to identify the intentionally spiked off-flavor in Panel 4 (which is way more challenging than detecting off-flavors spiked into Heineken). This feedback is provided at the end of the exam, where answers are revealed (with an option to opt out). Starting from such a low baseline made it incredibly difficult to achieve the required 75% overall, necessitating nearly perfect scores of 95% in Panels 2 and 4. Now, the off-flavor part in Panel 4 counts for 10% of the score. Failing to identify this meant that the scores in the remaining sections had to be flawless: 100% in Panel 2 and 90% in Panel 4. Achieving such perfection proved nearly impossible, leading to my failure on both attempts. To pass, it’s essential to avoid scoring too low in Panels 1 and 3, maintaining a certain threshold.
In my third attempt, I scored 67% (4/6) in Panel 1, 95% in Panel 2, 60% (3/5) in Panel 3, and 85% (with the off-flavor failing as usual) in Panel 4, which totaled 76%, barely enough to pass. Phew!
The Written Exam was also tough; it’s a 6-hour ordeal, including eight essays (technically, two sessions of 2:50 each, each containing four essays, all on the same day). Besides essays, there were multiple-choice questions. Without the help of Beer Scholar this time, I decided to tackle it once to see how it would go (yes, it was an expensive trial). Unlike Level 2, there were many “long-draw draft line”-related questions that caught me off guard. There were also numerous food-related questions that had little to do with beer, which I nearly all missed. The essays were complex and required deep knowledge of settings in a “professional brewery environment,” not just homebrewing. Not surprisingly, I failed. But my score was not far off (74, with 80 needed to pass), so I remained optimistic.
For the second trial of the written exam, I specifically studied the draft line system using the Brewers Association Draught Beer Quality Manual (don’t be fooled into paying $24.95; there’s a free download option on the right side of the page!) and culinary topics by checking every single item listed in the syllabus and Ikasu_Beer_Study_v01.xlsx (link above), using just Wikipedia. I aimed to complete the multiple-choice section as quickly as possible, leaving 2 hours for the four essays (30 minutes each). This strategy worked, and I passed on my second attempt.
Reflections: Building Friendships and Brews
Perhaps I’ve neglected to mention one of the most rewarding parts of this journey—the deep, lasting friendships I’ve forged along the way. Each phase of becoming a beer judge and tackling the Cicerone® exams has been more than just a series of tests; it has been a vibrant, communal experience full of shared passion for craft beer.
Being a beer judge isn’t merely about evaluating brews; it’s about coming together with others who share the same enthusiasm for craft beer. It’s these moments—when I step into an event and see so many familiar, smiling faces—that I truly cherish. The bonds we’ve formed go beyond mere acquaintances; we’ve become a close-knit community of enthusiasts, supporting and inspiring one another.
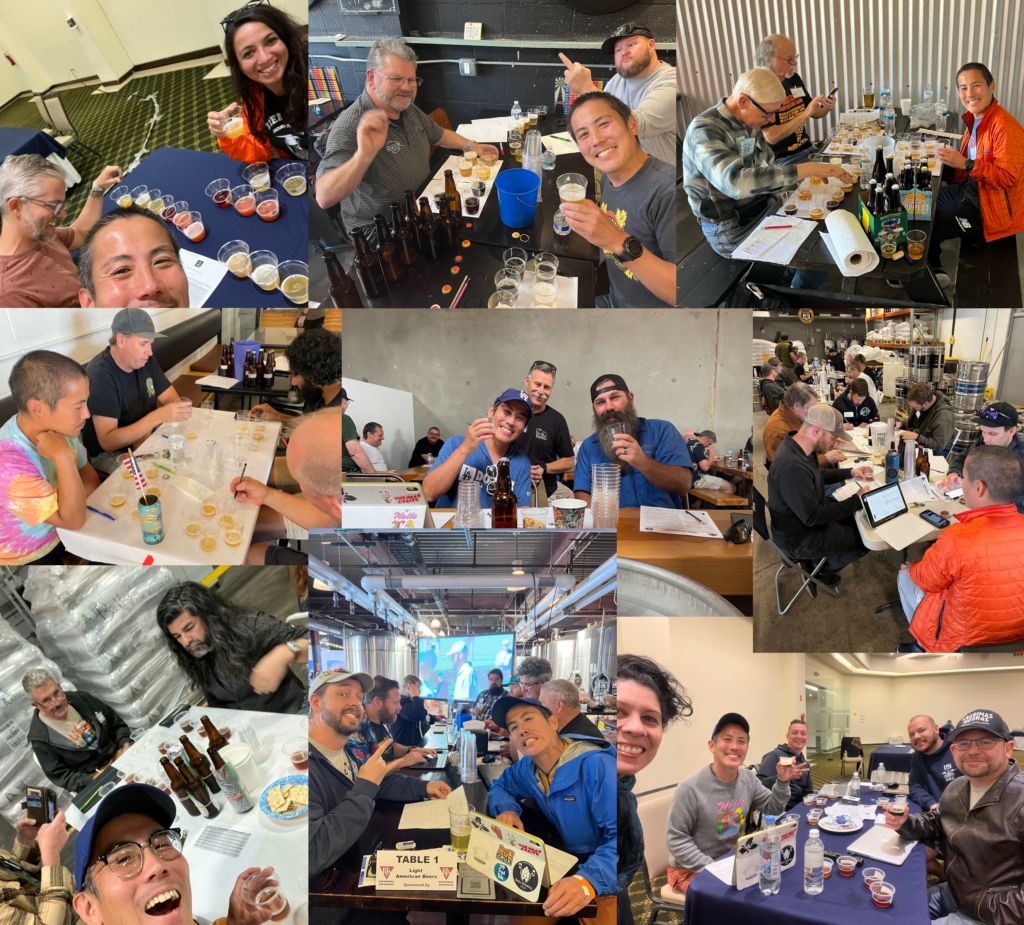
At the Cicerone® Tasting exams, I met some of the most ambitious and creative people in the industry and among hobbyists. These connections quickly evolved into friendships as we shared our stories and aspirations. Often, we would gather the day before the exams, sharing pints and stories in a relaxed setting that turned pre-exam jitters into moments of connection and mutual support. These pre-exam (and, of course, post-exam) meetups, filled with laughter and encouragement, have been some of the most enriching experiences of my life. They remind me that the journey through the world of beer is as much about the people we meet and the bonds we form as it is about the beer itself.

These credentials have not only given me a deeper insight into the craft but have also equipped me with the tools to educate others and foster a richer beer culture within my community. The knowledge and confidence I gained are invaluable, laying a solid foundation for my entrepreneurial venture, Ikasu Brewing. This endeavor isn’t just about selling beer; it’s about creating a space where people can learn, share, and grow together through their shared love of craft beer.
Looking ahead, I am excited to leverage my skills and insights to innovate within the brewing industry, contribute to its evolution, and continue building community through Ikasu Brewing. My journey through the Cicerone® and BJCP programs has prepared me to face the challenges of this competitive industry with a creative and informed perspective. Ultimately, these experiences affirm that the pursuit of knowledge is as rewarding as it is transformative, propelling us not just in careers but in contributions to community and culture.
Don’t forget to download this. And start studying beer! Kanpai!
Congrats on the accomplishments Masahiro! Also on the very frequent homebrewing competition successes. Site looks great, will be sure to bookmark and check back often for good content 🙂
Dang, you are awesome!! Please do, and I’ll definitely keep you posted!
Your blog has been incredibly inspiring, and I am very impressed with your accomplishments! Congratulations, Masa. Keep up the great work!
Thanks, Hanii, and congrats on your successful achievement with the BJCP certification! I hope this helps you pass your Cicerone exam as well. Cheers!
Great post!
This is the first time I’ve read anything about the process to become a BJCP certified judge. It previously seemed too much work and trouble but after reading your experience, perhaps it is not as difficult as I had imagined. I appreciate you providing the spreadsheet. It should come in handy.
Also, as homebrewers, we more often than not have to dig very deep to find any new information about homebrewing. I am glad that your posts are providing another resource for us to check out
Thank you for the comment, Memo! Yes, it just sounds intimidating, but it really isn’t that difficult. The problem is simply the lack of proper information (many blog posts just brag about their hard work, saying “I studied my ass off”), which is why I elaborated on this post. I hope this helps and that you become a Certified Judge soon! Regarding the brewing aspect, I’ll keep it posted for sure. Cheers!
Many congratulations for your achievement, but above all thank you very much for sharing all this info. It will be of great help to me to advance in my own road.
Thank you so much! I’m glad you found the information helpful. Best of luck on your journey! Cheers!
Find the best online schools in South Carolina, Earn your degree without ever stepping foot on a campus.
Balancing work and school is easy with online programs in South Carolina.
South Carolina’s top online schools at your fingertips.
Benefits of online schools in South Carolina.
Connect with top online schools in South Carolina.
Discover the right fit for your educational needs in South Carolina.
Experience the convenience of online learning in South Carolina.
Online schools in South Carolina: a smart choice for busy individuals.
Elevate your career with online education in South Carolina.
Transform your future with online schools in South Carolina.
Online Schools in South Carolina [url=http://onlineschoolsc6.com/]http://onlineschoolsc6.com/[/url] .
Discover the top online schools in Tennessee, right here.
Considering online schools in Tennessee?, Check out these top options.
Find the best online schools in Tennessee, with our comprehensive guide.
Interested in learning more about online schools in Tennessee?, Start your search here.
Our website features the top online schools in Tennessee, in one convenient location.
Discover the top benefits of online schools in Tennessee, starting today.
Want to find reputable online schools in Tennessee?, You’re in the right spot.
Make the smart choice with online schools in Tennessee, based on our in-depth research.
Find the perfect fit with online schools in Tennessee, right away.
Begin your education with online schools in Tennessee, with our guidance.
Online Schools in Tennessee [url=https://onlineschooltn1.com]https://onlineschooltn1.com[/url] .
Discover the top online schools in Iowa, on this website.
Join the ranks of successful students at online schools in Iowa.
Succeed in your studies with online schools in Iowa.
Find the perfect online school in Iowa for your needs.
Learn from the best at online schools in Iowa.
Take the first step towards your dream job with online schools in Iowa.
Convenience meets excellence at online schools in Iowa.
Unlock the advantages of online education in Iowa.
Connect with fellow students at online schools in Iowa.
Master your studies with online schools in Iowa.
Online Schools in Iowa [url=https://www.onlineschoolia7.com/]https://www.onlineschoolia7.com/[/url] .
Лучший выбор – сканер Scanform L5 | Специальные условия на сканер Scanform L5 | Почему сканер Scanform L5 – лучший выбор? | Лучшее решение для офиса – сканер Scanform L5 | Инновационный сканер Scanform L5 | Продвинутый сканер для работы – Scanform L5 | Сканер Scanform L5: обзор функций и возможностей | Сканер Scanform L5: сочетание стиля и удобства | Купить сканер Scanform L5 по выгодной цене | Scanform L5: инновации в сканировании
Scanform L5 [url=https://an-form-5.ru/]https://an-form-5.ru/[/url] .
Онлайн образование на высшем уровне, чтобы расширить ваш кругозор.
Получите качественное образование удаленно, доступные в любое время.
Профессиональные преподаватели на платформе, готовых помочь вам каждый день.
Присоединяйтесь к лучшим онлайн курсам прямо сейчас, не откладывая на завтра.
Обучение через интернет для всех возрастов, с возможностью выбора курсов по интересам.
Преимущества онлайн обучения, для вашего успеха.
Онлайн обучение: ключ к знаниям, для развития ваших навыков.
Улучшите свои знания с онлайн обучением, для вашего профессионального роста.
Инновационные методы обучения в онлайн школе, для вашего комфорта.
Online School [url=https://privateschoolreview.com/legacy-online-school-profile/]https://privateschoolreview.com/legacy-online-school-profile/[/url] .
Изучайте дистанционно: онлайн учеба.
Получайте новые знания в любое удобное время.
Станьте экспертом в своей области с онлайн курсами.
Учите новое без напряжения: интернет школа.
Получайте качественное образование удаленно.
Онлайн учеба для успешного развития навыков.
Образование на расстоянии через онлайн платформу.
Развивайтесь где угодно с онлайн курсами.
Изучайте новое в удобном формате онлайн курсов.
Развивайтесь гибко через онлайн платформу.
Online School [url=http://www.querianson.com/the-future-of-education-exploring-the-advantages-of-online-school/]http://www.querianson.com/the-future-of-education-exploring-the-advantages-of-online-school/[/url] .
Choose the best online schools for your child, with a wide range of training programs.
The best online schools to study at home, detailed review.
Secrets of successful learning in an online school, understand the main points.
How to make learning interesting for your child at an online school, get useful tips.
What you need to know before starting an online school, understand the main points.
How not to make a mistake when choosing an online education, detailed analysis.
Choose interesting online courses to learn a new language, improve your skills.
Learning at an online school: how not to lose motivation, get useful tips.
How to create the perfect distance learning workspace, get detailed instructions.
Compare online and offline education, decide what’s right for you.
Best Online Adult Schools: Choose your Learning Path, improve your skills.
How to properly study online, understand the main points.
Best programming courses in online schools, improve your skills.
Online learning: a new format of education, reach new heights.
Why choose Online Learning for your child, get the most out of it.
How to organize online education for your child at home, get useful tips.
Best Online Schools for Your Child, improve the quality of education.
onlineschool [url=https://onlk12-st5.com/]onlineschool[/url] .
Hey Masa,
I just wanted to drop you a quick note to say a massive thank you for all the help your blog has given me in preparing for the Certified Cicerone and BJCP exams. Your articles were super insightful, and the files you shared were a game-changer.
I feel way more confident now, all thanks to the time and effort you’ve put into sharing such useful content. I really appreciate it!
Keep up the awesome work, it’s making a big impact!
Cheers from Belgium,
Corentin
Good https://is.gd/tpjNyL